Uploading Using File Manager in cPanel
In this tutorial we will walk you through how to upload files using the File Manager in cPanel.
Upload files to your cPanel account easily from anywhere using your web browser and the cPanel File Manager.
Alternatively, you can upload files using FTP using an FTP client.
To upload files with the File Manager, follow these steps:
- Log in to your cPanel account.
Follow this guide to learn how to access your cPanel account. - Under the Files section, select “File Manager”.
Tip: Use the quick search bar at the top of your cPanel account for speedy navigation.
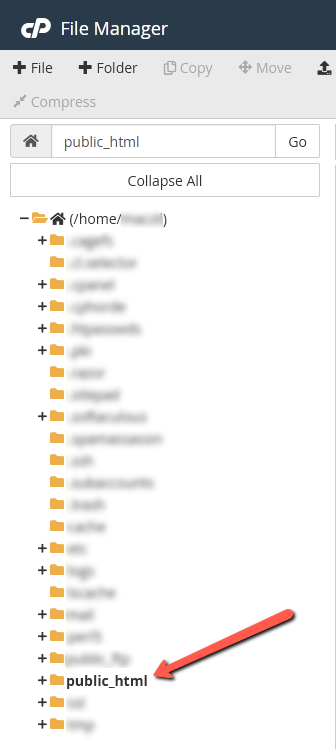
- Select the directory you want to upload your files to.
Normally this will be the Web Root (public_html/www) directory.
Note: If you are using the File Manager for the first time you might be seeing a pop-up modal asking you to choose the directory: in most cases you will choose “Web Root”.
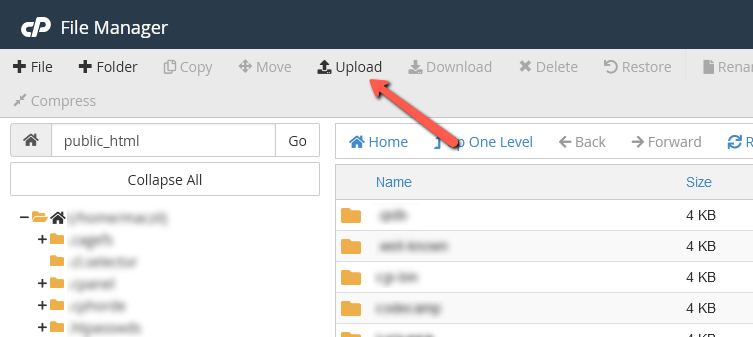
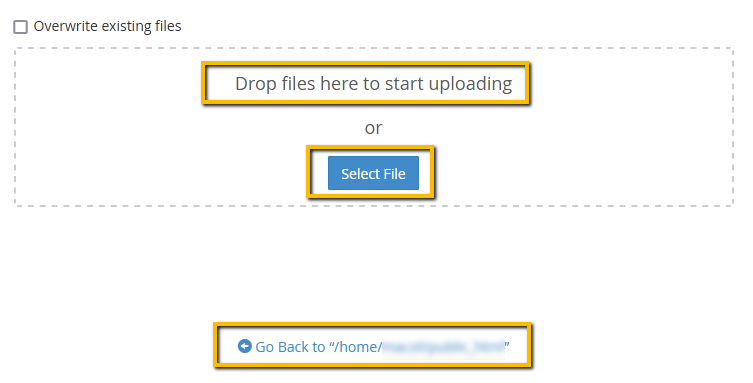
- Inside the File Manager, select the “Upload” button in the top bar, then upload your files.
Once the file(s) has finished uploading it will appear in the directory. To go back to the directory, select the “Go Back to…” link at the bottom.

- Congratulations! You have successfully uploaded a file using File Manager.
