Accessing Your cPanel Account
In this tutorial we will walk you through how to access your MCloud9 cPanel account.
The cPanel control panel allows you to add/edit/remove website files and databases, install apps, create domain redirects and subdomains, access/modify DNS settings, create backups and much more.
Learn more about the cPanel Control Panel here.
To access your cPanel account, follow these steps:
- There are two easy methods to access cPanel:
- Method 1:
The first and easiest method is to use your custom cPanel URL; this is your full domain followed by “/cpanel”.
For example, if your domain is www.example.com, you would use www.example.com/cpanel.
Tip: You may want to bookmark your cPanel URL for ease of access. - Method 2:
The second method is to access cPanel through your Client Portal.
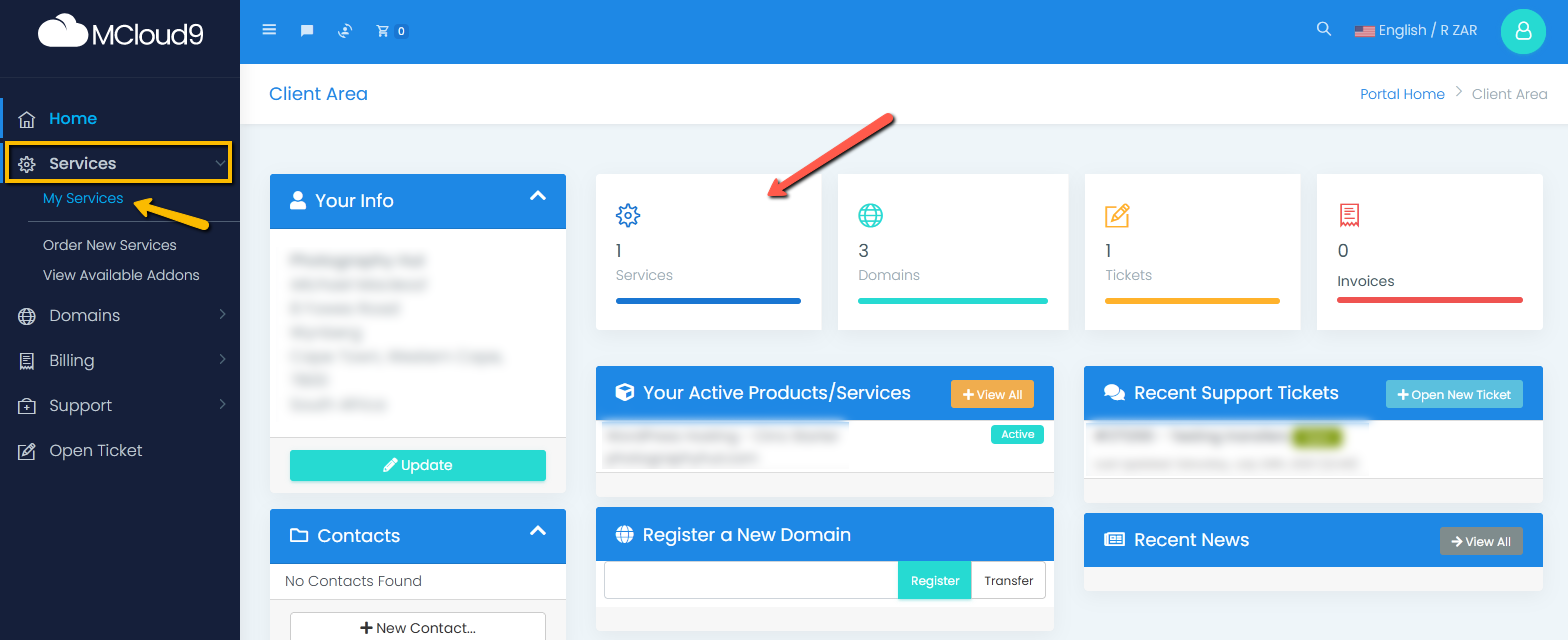
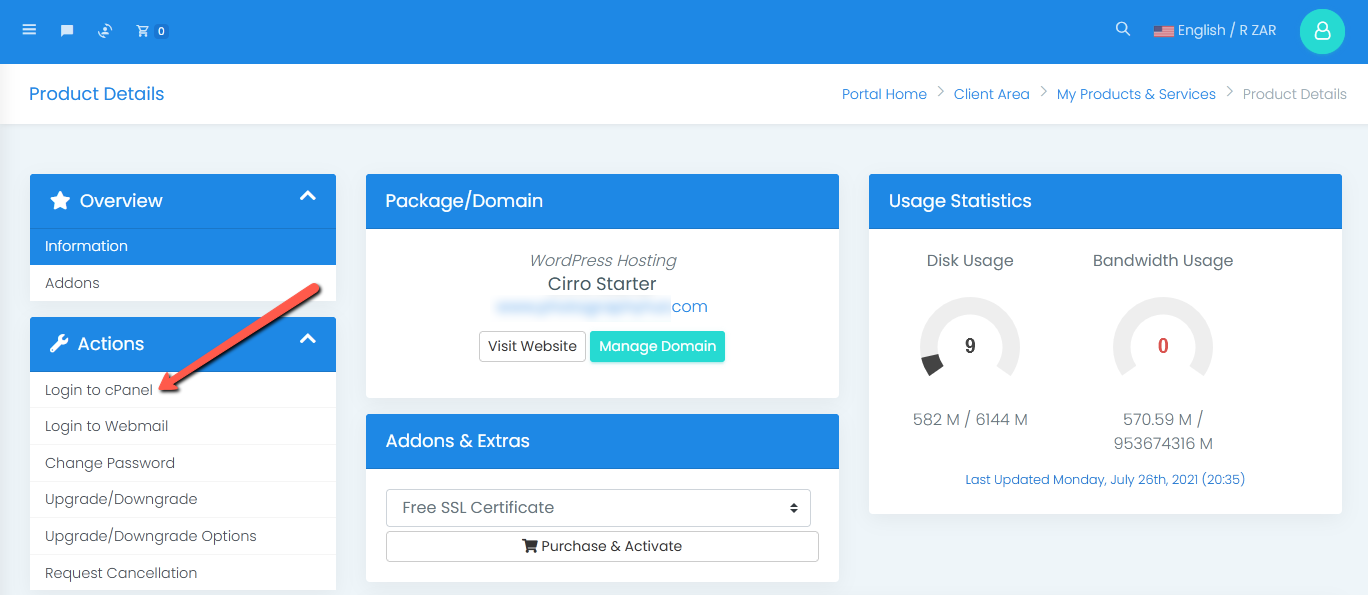
To do this: log in to your Client Portal (learn how to access your Client Portal here) > Select the “Services” box (or select “Services” from the side menu and choose “My Services”) > Select your hosting product/service > Choose “Login to cPanel” (under the “Actions” panel).


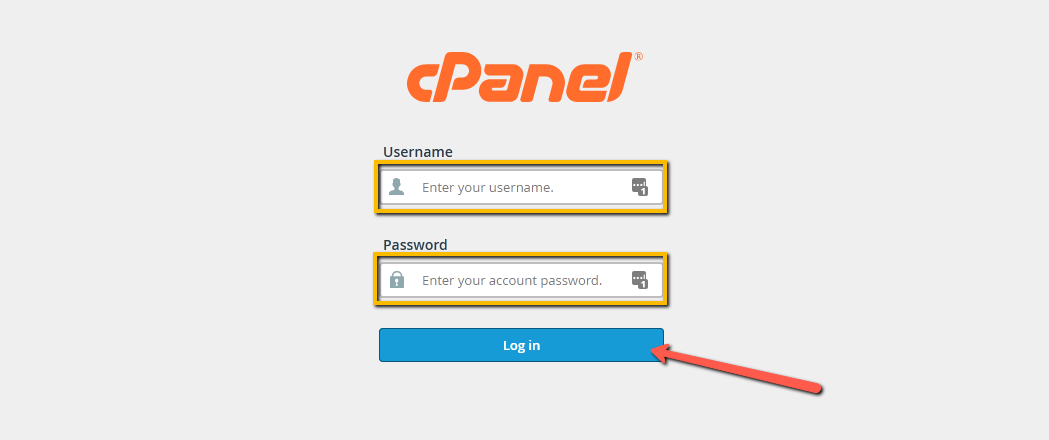
- Enter your cPanel account login details and select “Log in”.
Your cPanel login details are included in your “New Account Information” email which would have been sent to you after setting up your hosting plan.
Note: If you are having difficulty locating the email, access it using the Email History option in your Client Portal > Select the Profile Menu (the circular “avatar” icon at the top-right) > Choose “Email History” > Find the email titled “New Account Information”.
- Congratulations, you have successfully logged in to your cPanel account!
When you are finished using cPanel, log out by selecting the “Logout” button at the top-right of your cPanel account..
