Securing Your cPanel Account
In this tutorial we will walk you through several ways to increase the security of your cPanel account.
Your cPanel account contains all of your website and email data and configurations so it’s very important to keep it as secure as possible.This includes changing your cPanel password regularly, adding Two-Factor Authentication, scanning your website and emails for viruses, and blocking any malicious IP addresses from accessing your website.
To change your cPanel password, follow these steps:
- Log in to your cPanel account.
Follow this guide to learn how to access your cPanel account. - Select the Profile Menu (top-right), then choose “Password & Security”.
You can also access “Password & Security” under the Preferences section.
Tip: Use the quick search bar at the top of your cPanel account for speedy navigation.

- Enter your old password and your new password, then select “Change your password now!”
Tip: Aim for a password strength of 80 or more and make sure to keep it in a safe place.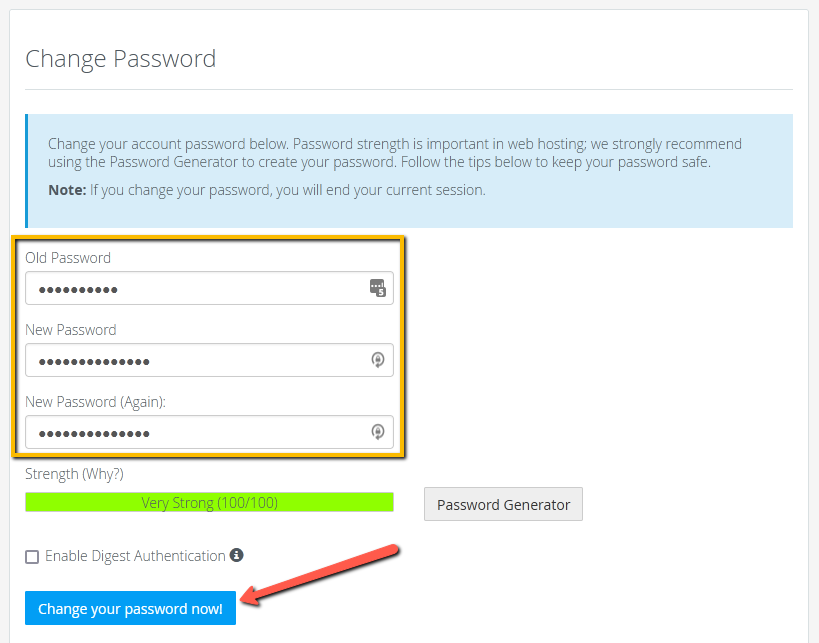
- Congratulations! You have successfully changed your cPanel password.
To set up Two-Factor Authentication (2FA), follow these steps:
- Log in to your cPanel account.
Follow this guide to learn how to access your cPanel account. - Under the Security section, select “Two-Factor Authentication”.
Tip: Use the quick search bar at the top of your cPanel account for speedy navigation.
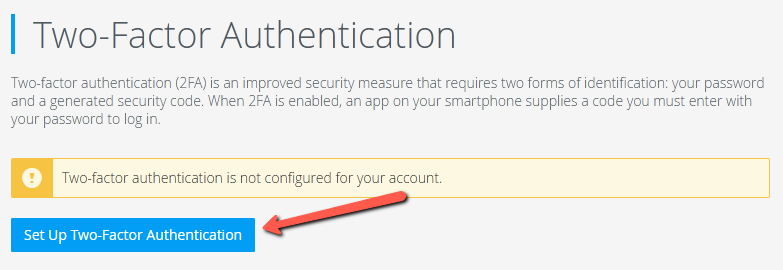
- Select "Set Up Two-Factor Authentication".
- Scan the QR code, or enter the information manually, with your two-factor authentication app.
Learn how to install an authentication app on your mobile device if you don’t already have one.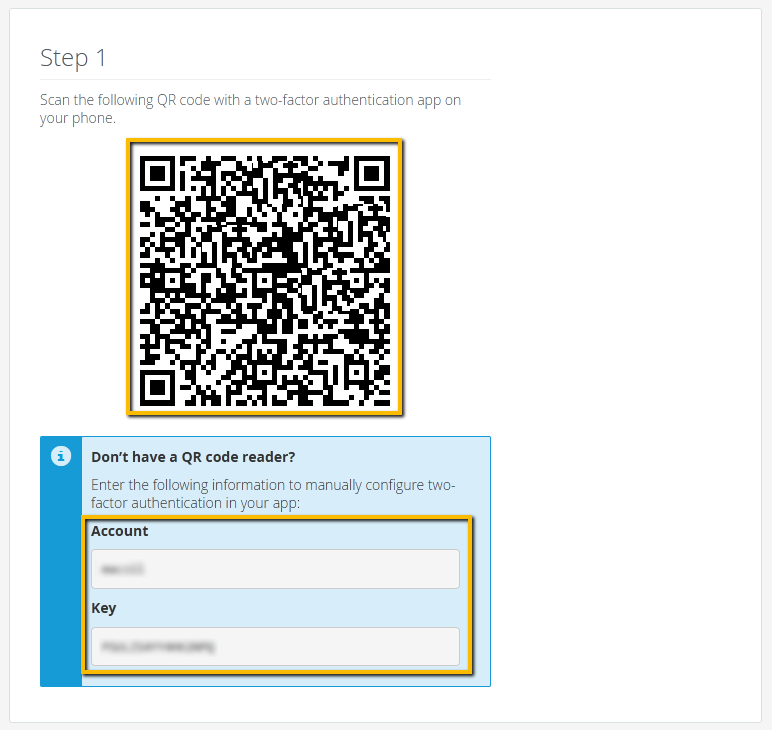
- Enter the security code generated by the authenticator app, then select “Configure Two-Factor Authentication”.
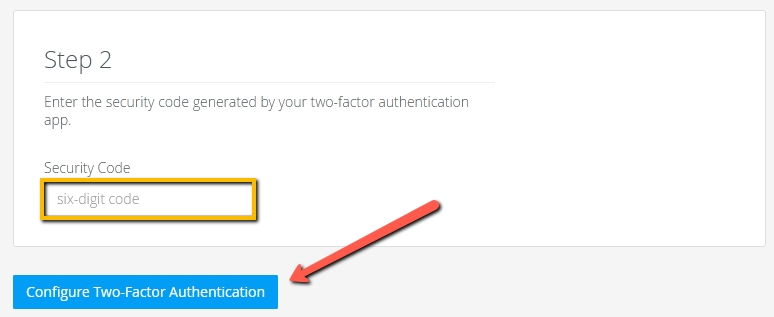
- Congratulations! You have now set up Two-Factor Authentication.
From now on, when you log in to your cPanel account, you will be required to enter your security code in addition to your account login details.
Note: You can easily disable your Two-Factor Authentication by going back to the “Two-Factor Authentication” settings.
To scan your website and email files, follow these steps:
- Log in to your cPanel account.
Follow this guide to learn how to access your cPanel account. - Under the Advanced section, select “Virus Scanner”.
Tip: Use the quick search bar at the top of your cPanel account for speedy navigation.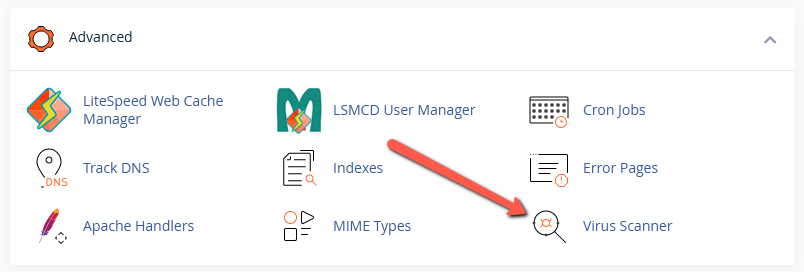
- Select the type of scan you want to perform, then choose “Scan Now”.
The virus scan will begin immediately. The length of time it takes depends on the amount of files you have.
Once the scan is complete the scan results will be displayed along with any actions to take, if applicable.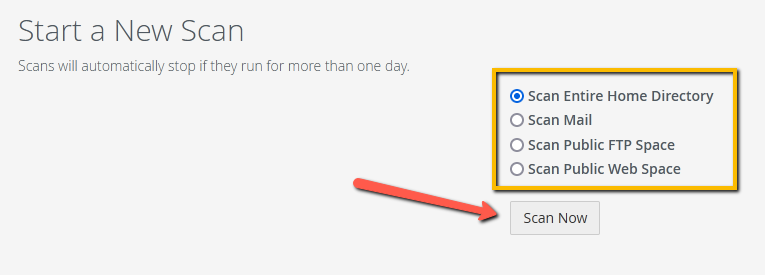
- Congratulations! You have now performed a virus scan.
Tip: While MCloud9 runs daily virus scans on all our servers, we encourage all our customers to run a virus scan at least once a month.
To block IP addresses using cPanel, follow these steps:
- Log in to your cPanel account.
Follow this guide to learn how to access your cPanel account. - Under the Security section, select “IP Blocker”.
Tip: Use the quick search bar at the top of your cPanel account for speedy navigation.
- Enter the IP address or domain you wish to block, then select “Add”.
Note: You can view examples of adding different types of IP addresses below the “Add” button.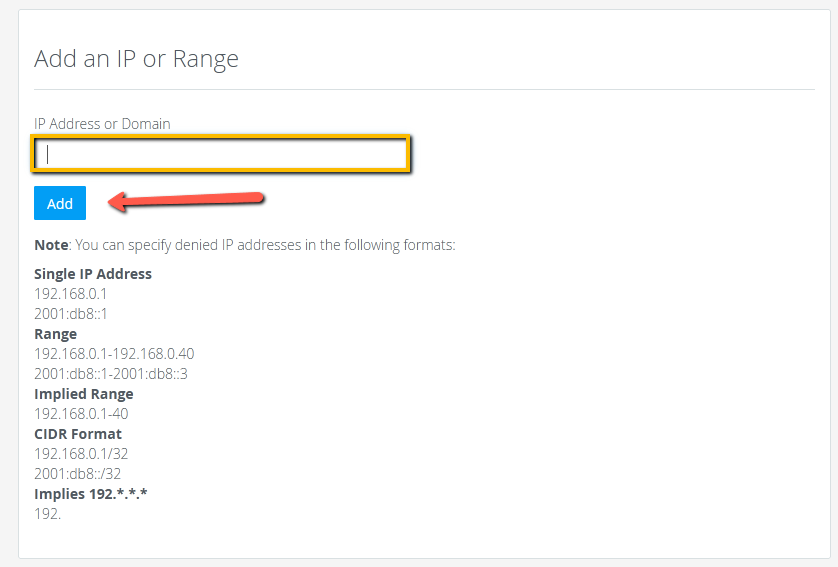
- Congratulations! You have successfully blocked an IP address.
You can easily view and delete your blocked IP addresses in the “Currently-Blocked IP Addresses” section at the bottom of the IP Blocker page.
