Creating a Backup of Your cPanel Account
In this tutorial we will walk you through creating a backup of your cPanel account.
MCloud9 routinely creates full server backups; however, these backups are retained for a limited amount of time in order to optimize storage. Therefore, it is always a good idea to regularly create your own backup of your account so you can store it for as long as you like.
cPanel backups allow you to save all your website, database and email files for safekeeping.
To backup your cPanel account, follow these steps:
- Log in to your cPanel account.
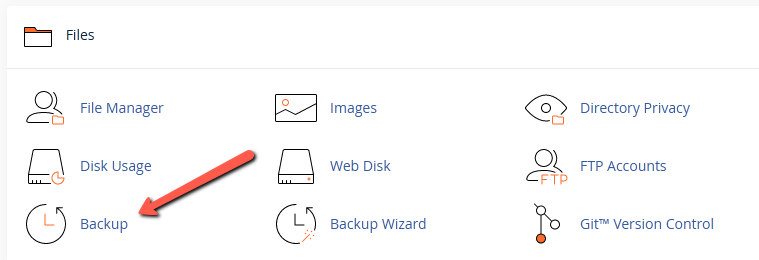
Follow our guide to learn how to access your cPanel account. - Under the Files section, select “Backup”.
Tip: Use the quick search bar at the top of your cPanel account for speedy navigation.
- If you want to create a backup of all your cPanel account data (incl website files, emails, databases, etc.), under Full Backup, select “Download a Full Account Backup”.
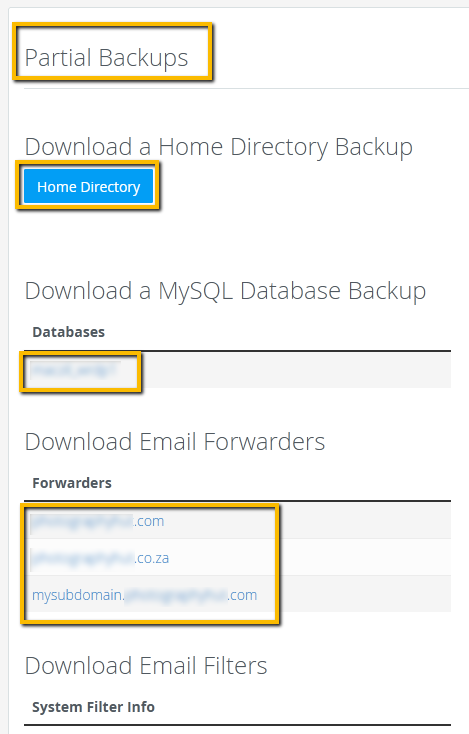
If you only want to backup some of your account data, under Partial Backups, select the backup you want to create.
Note: If you use Partial Backups, the backups will be immediately available to download. You can skip the next few points as they pertain to Full Backups only.

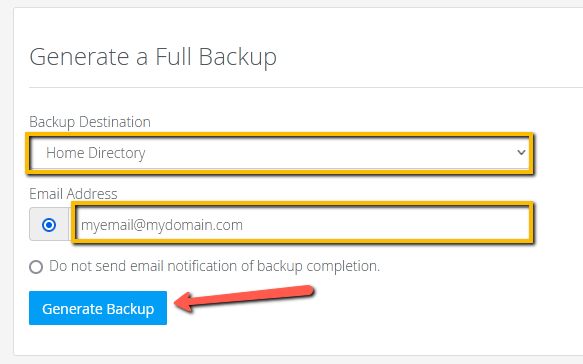
- Under Generate a Full Backup, select the backup destination and confirm the email address, then select “Generate Backup”.
The Backup Directory is where the backup will be sent to (by default the Home Directory is used).
Note: You will be notified by email once the backup has completed.
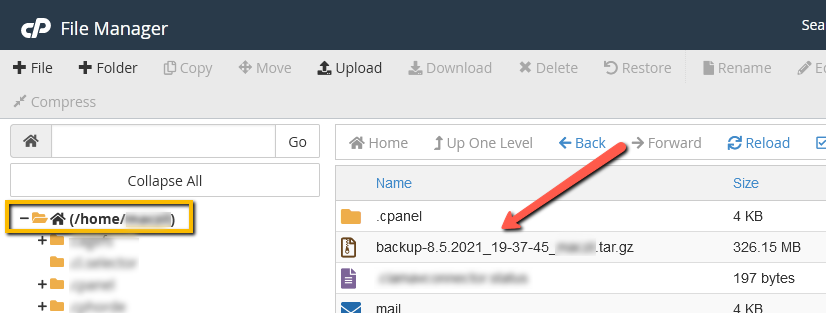
- To download the full backup, go to “Backup” in cPanel, and select your backup from the Backups Available for Download section.
Alternatively, you can navigate to the Home directory inside File Manager and download it from there.
Tip: After downloading your backup, be sure to delete it from your cPanel account (using the cPanel File Manager) so that it doesn’t use up your available storage space.

- Congratulations! You have successfully created a backup of your cPanel account.
If you need assistance restoring a backup, feel free to contact our Technical Support department (make sure to log in to your Client Portal for access to our priority ticket support service).
