Setting Up Your Web Hosting
In this tutorial we will walk you through how to set up your web hosting with MCloud9.
Web hosting is a service provided by hosting companies that allows you to "rent" space on a server where your website will be stored.
Once your website is hosted it is accessible to anyone in any location 24/7/365. Learn more about web hosting.
Note: If you have an existing website with another hosting company and wish to move it to MCloud9, see our tutorial on Transferring Your Website(s) to MCloud9.
To set up your web hosting, follow these easy steps:
- From the MCloud9 Home page, select the "Hosting" tab from the top navigation and choose "Web Hosting".
Alternatively, go straight to www.mcloud9.co.za/web-hosting.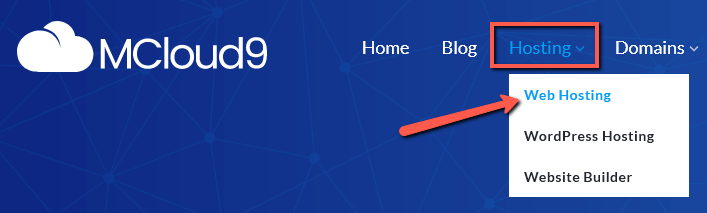
- Select your web hosting plan using the “Order Now” button.
The main difference between our web hosting plans is the storage space and resources given.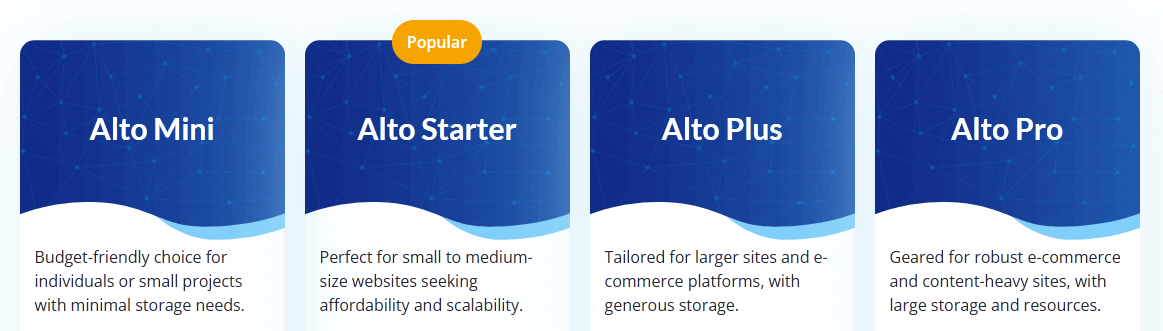
Once you’ve made your decision, select the “Order Now” button to proceed.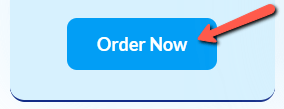
- Choose a domain if you don’t already have one and select “Check”.
With “Register a new domain” selected, enter your desired domain name and extension and select “Check”.
If you have an existing domain you can transfer your domain to MCloud9, alternatively you can keep it with your existing registrar/host and update the nameservers by selecting “I will use my existing domain and update my nameservers” and entering your domain.
Note: If this is your first time purchasing a hosting package from us you can take advantage of our free 1-year ".co.za" domain offer when signing up for a 12-month hosting plan.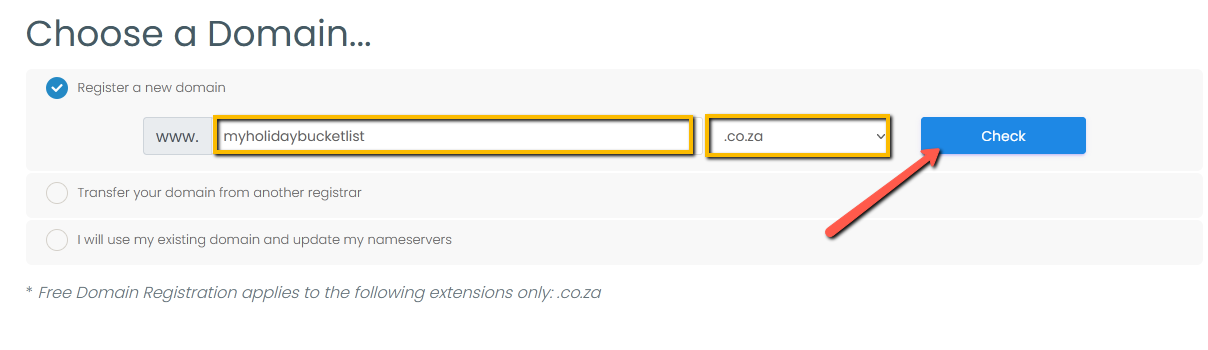
- If your domain is available select “Continue” (at the bottom).
If the domain is unavailable, try using a different domain or domain extension (e.g. “.net”).
Note: You can purchase multiple domains at a time by selecting the “Add” button.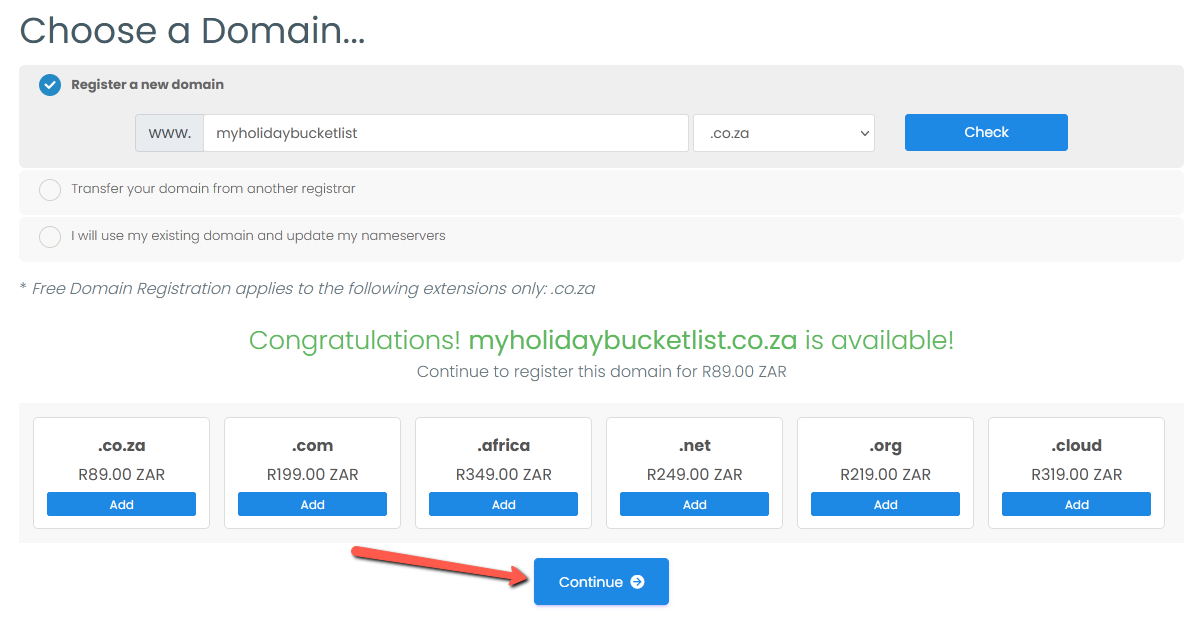
- Confirm the billing cycle for your hosting and include any addons you would like, then select “Continue”.
Note: The free 1-year ".co.za" domain is only available on hosting plans with a billing cycle of 12 months or more.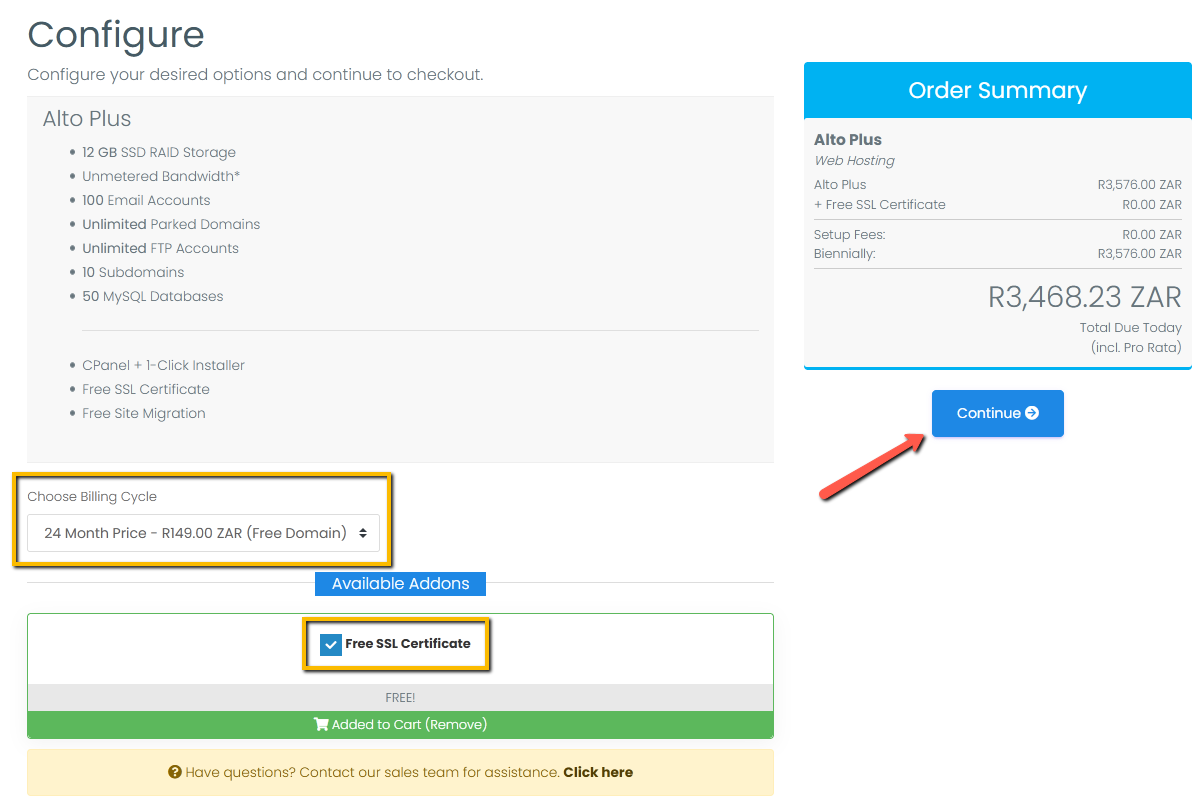
- Review your order and then select “Checkout”.
If you wish to make changes or remove any items you can select the “Edit” option or the “x” (remove) icon.
If you have a promo code, enter it in the promo code field and choose “Validate Code” to have it applied.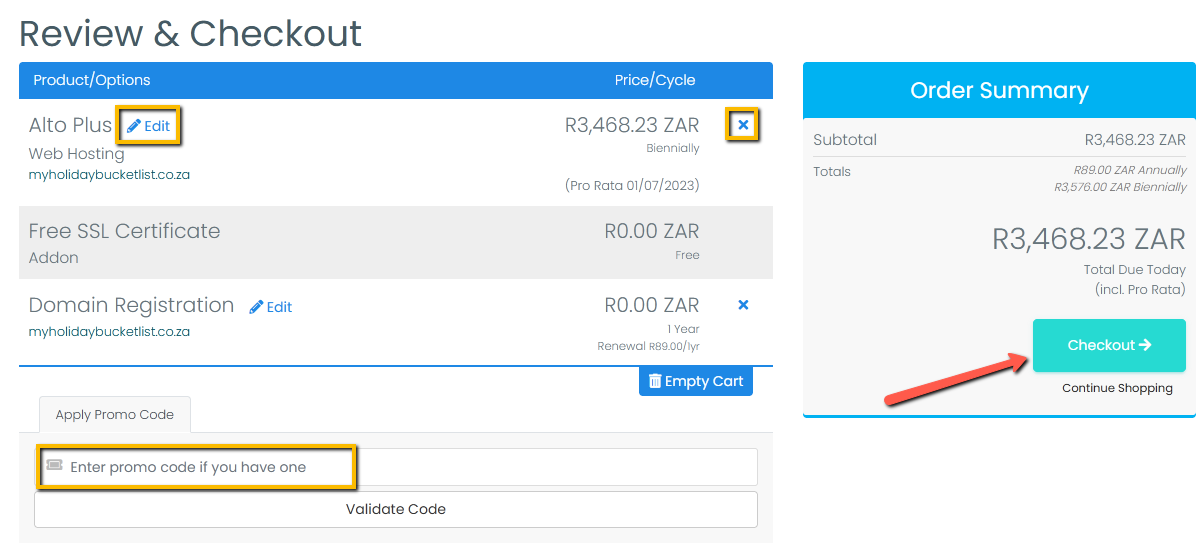
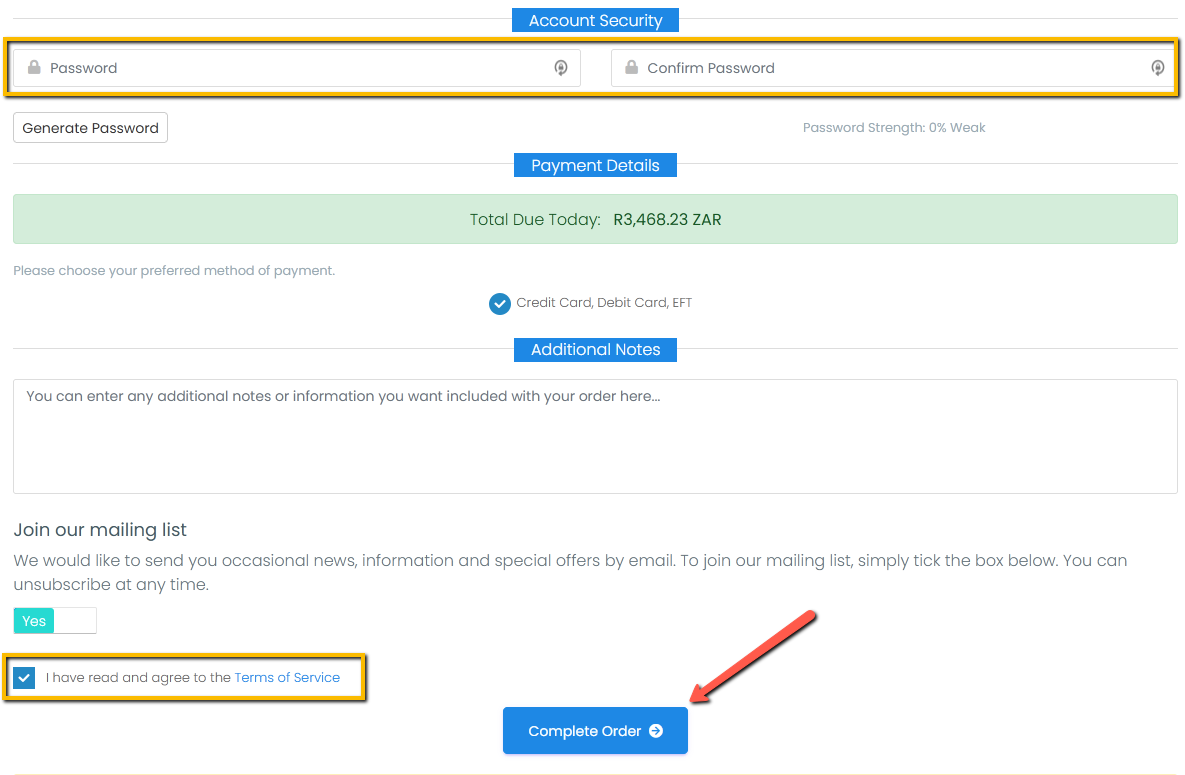
- On the Checkout page, fill in the required details and tick the agree to Terms of Service box then select “Complete Order”.
Note: If you already have an account with us, select "Already Registered" to login and have your details automatically filled in.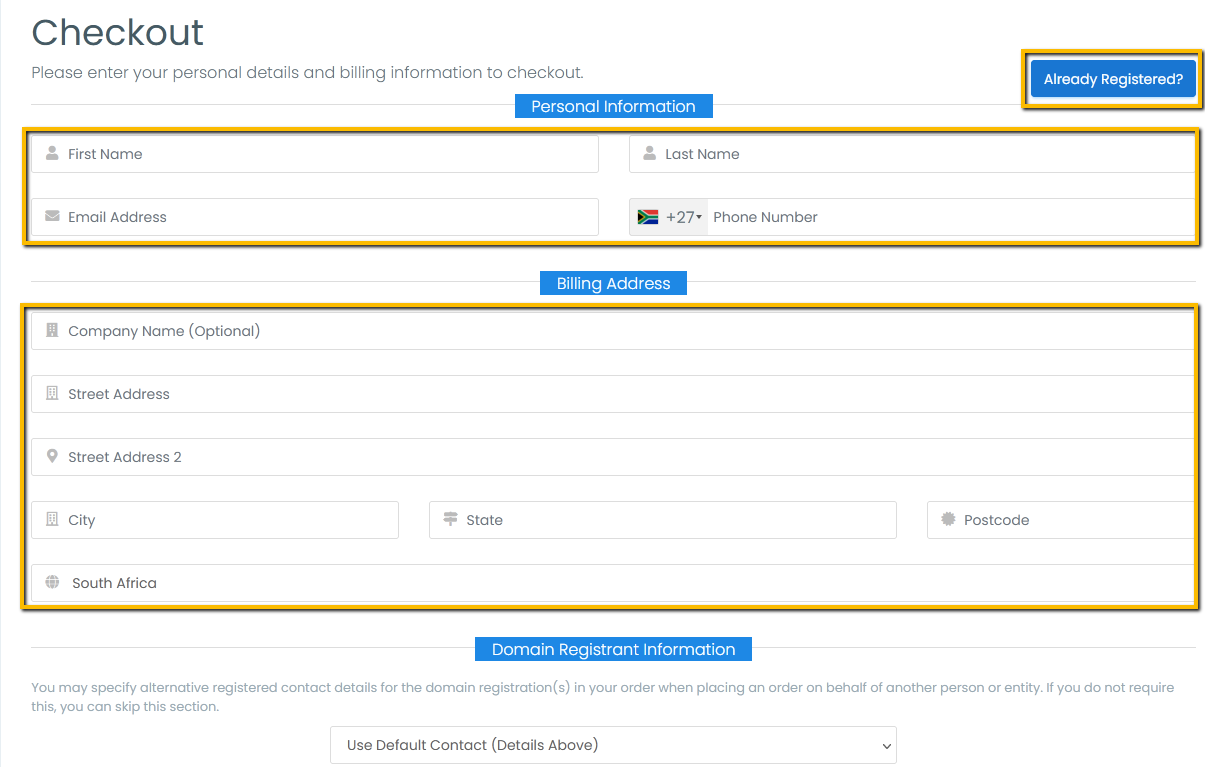
- To pay your invoice, select one of the two payment options: "Pay (automatic renewal)" or "Pay (manual renewal)".
The "Pay (automatic renewal)" option will automatically renew your services before they expire.
The "Pay (manual renewal)" option will require you to manually renew your services before the expire (re-entering your payment details each time).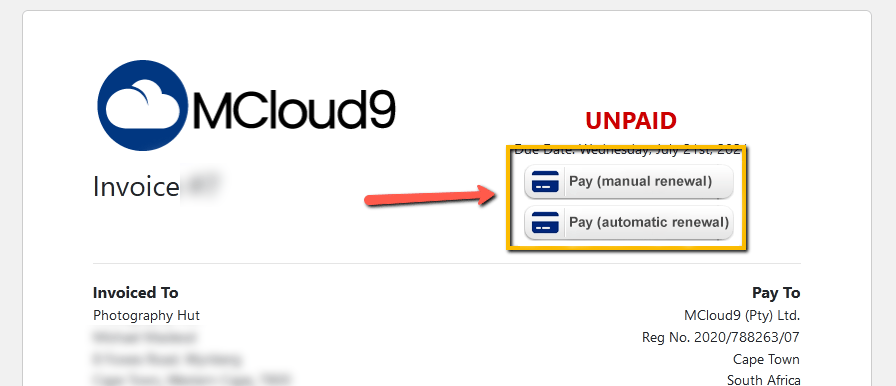
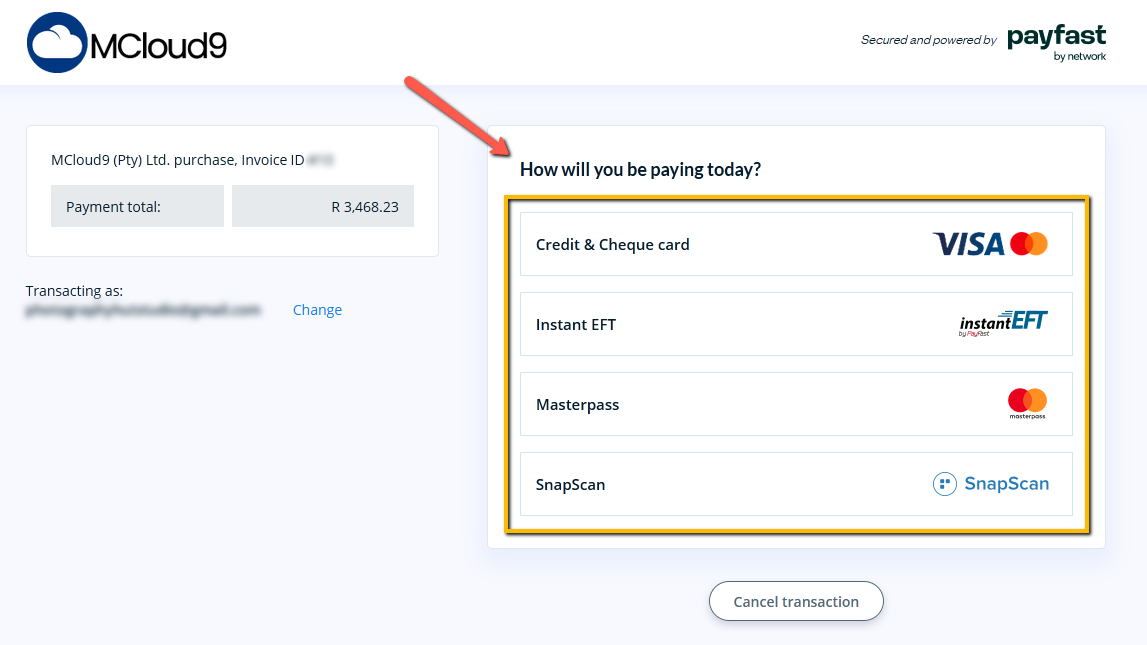
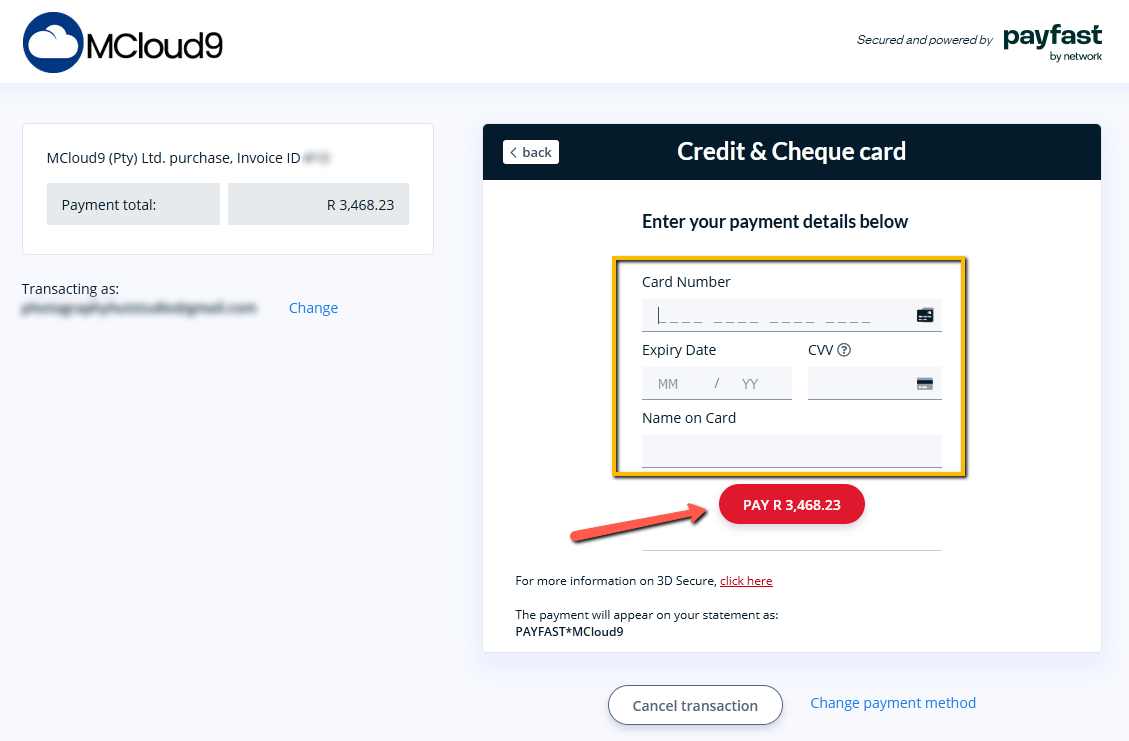
- After being redirected to our secure payment gateway, select your payment method (credit card, debit card, etc.) and complete the payment.
- Congratulations, you have now set up your web hosting!
After successfully completing the payment you will be redirected back to the paid invoice.
You will also receive an email with your invoice and links to your Client Portal where you can manage your services.
