Transferring Your Domains to MCloud9
In this tutorial we will walk you through how to transfer your domain(s) to MCloud9.
When you transfer your domain(s) to us you automatically get a free 1-year extension.
Note: In order for your domains to be transferred successfully they must have been registered, renewed, or previously transferred, more than 60 days ago.
To transfer a domain to MCloud9, follow these steps:
- Unlock the domain with your current registrar.
If you are unsure how to do this you should be able to ask your current registrar for assistance. If they are unable to assist, feel free to reach out to our support so we can help you. - Get the authorization code (EPP code or transfer key) from your current registrar.
It’s a good idea to verify the administrator’s contact information for your domain as that email address may be used during the transfer process. - From the MCloud9 Home page, select the "Domains" tab from the top navigation and choose "Transfer Domains".
Alternatively, go straight to www.mcloud9.co.za/transfer-a-domain.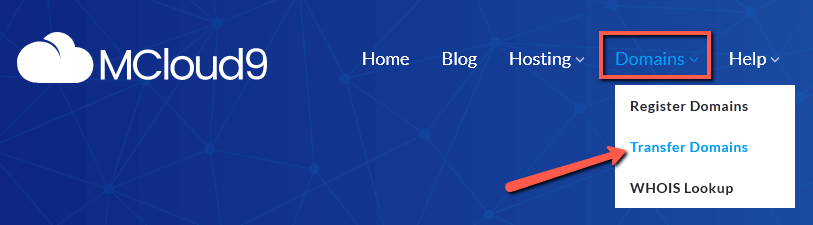
- Enter the domain you wish to transfer and select "Transfer".
To avoid any issues, be sure to enter the correct domain and extension (e.g. “mywebsite.com").
Verify that your domain extension is listed on our supported domains.
If it is not currently supported, reach out to us via our Contact Us page to see if we can help accommodate you.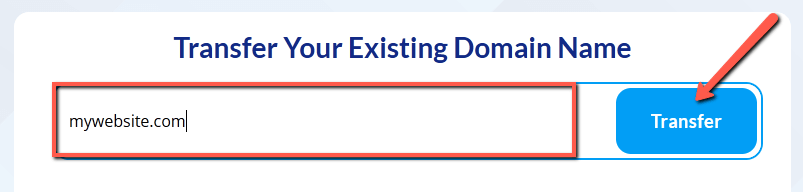
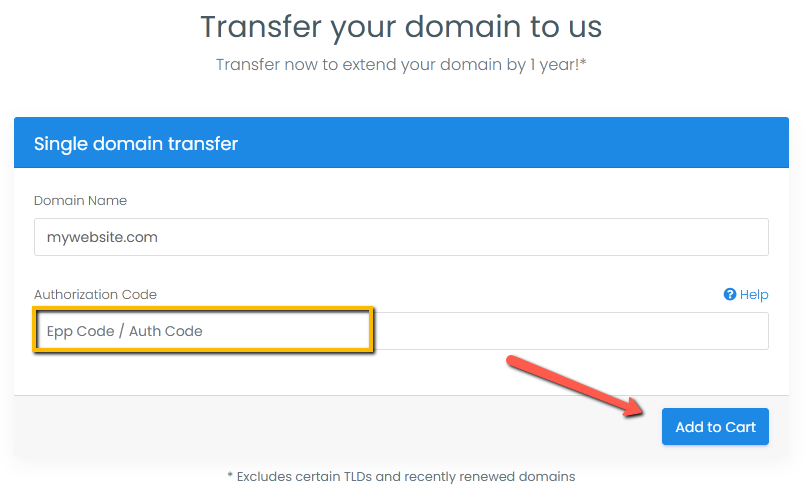
- Enter the authorization code (EPP code) from your current registrar and select “Add to Cart”.
On the Domains Configuration page select "Continue".
Also on this page you can add hosting, if desired, and configure the domain nameservers (keep the default settings if you plan on hosting with MCloud9).
You can always access and change your nameservers via the Client Portal.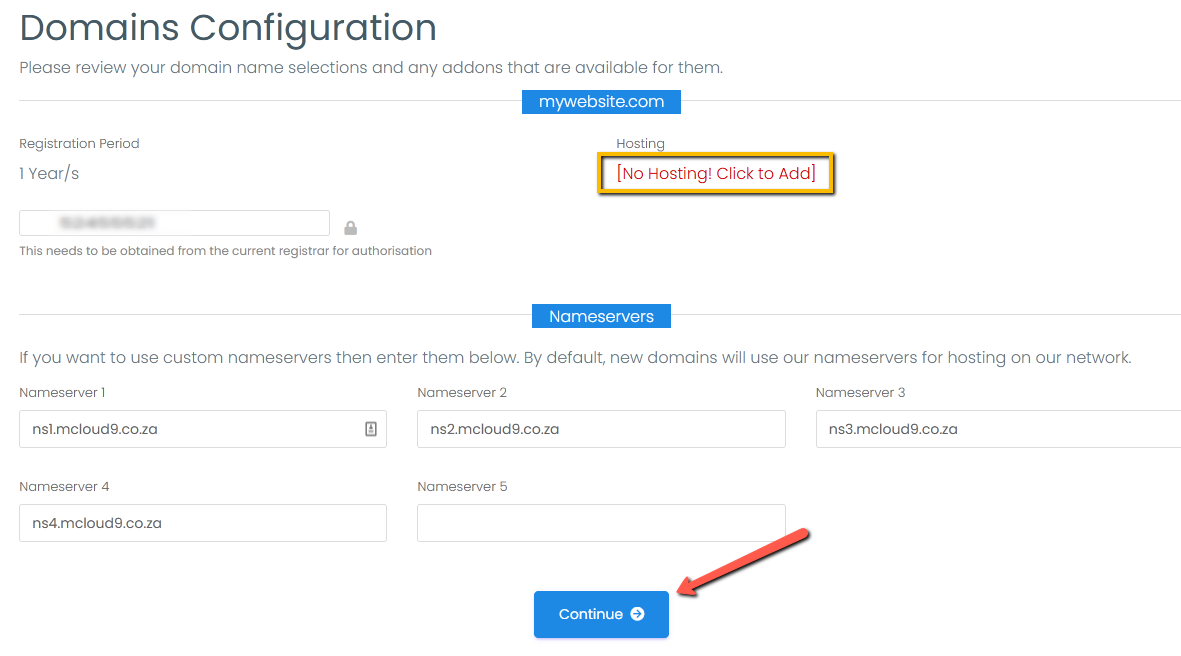
- Review your order and select "Checkout".
You can edit or remove any items by selecting the "edit" button or the "x" (remove) icon .
If you have a promo code then you can enter it in the field provided.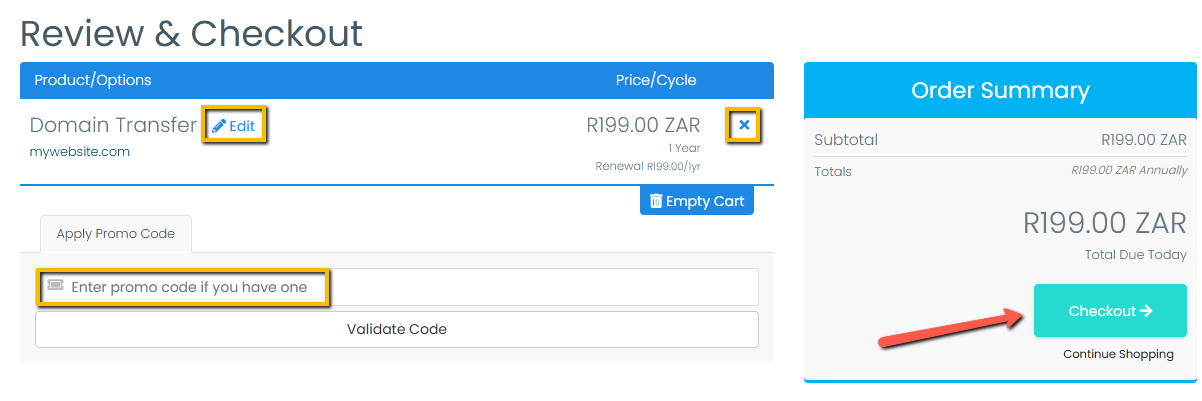
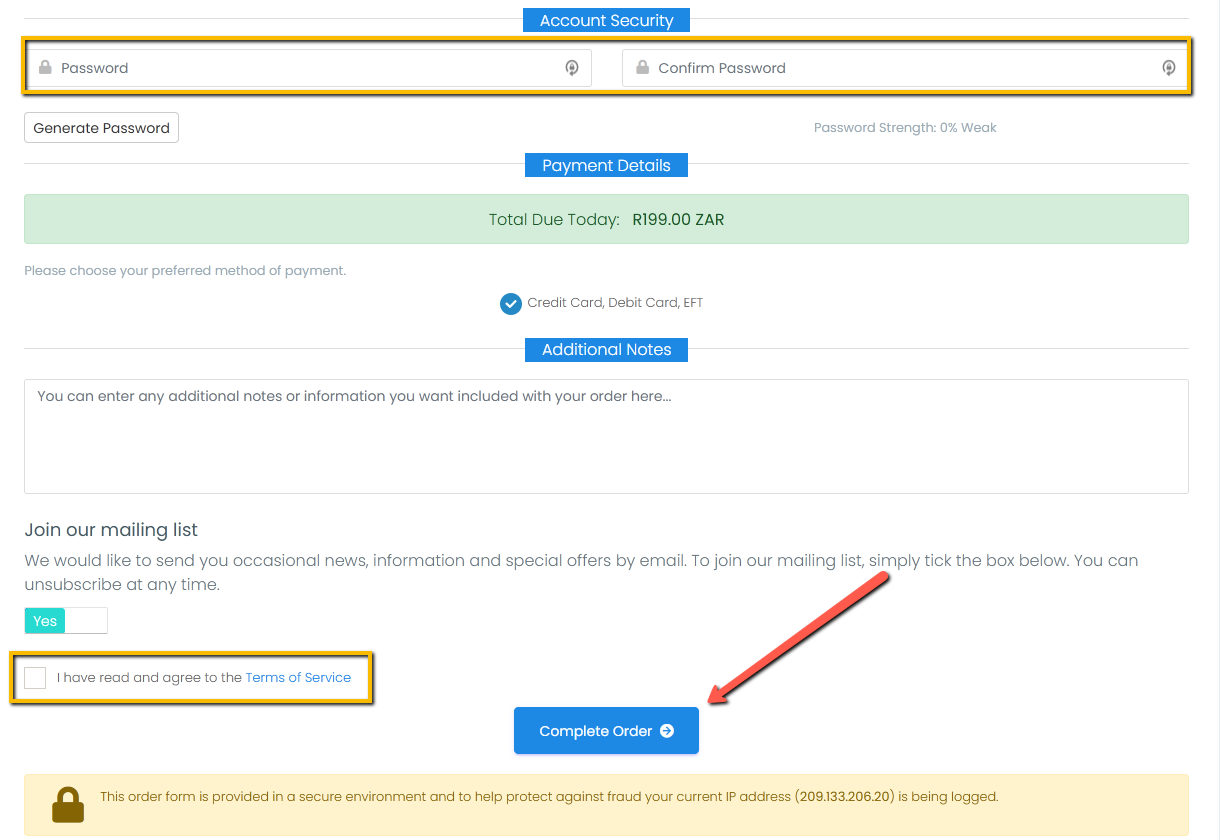
- On the Checkout page, fill in the required details and tick the agree to Terms of Service box then select “Complete Order”.
Note: If you already have an account with us, select "Already Registered" to login and have your details automatically filled in.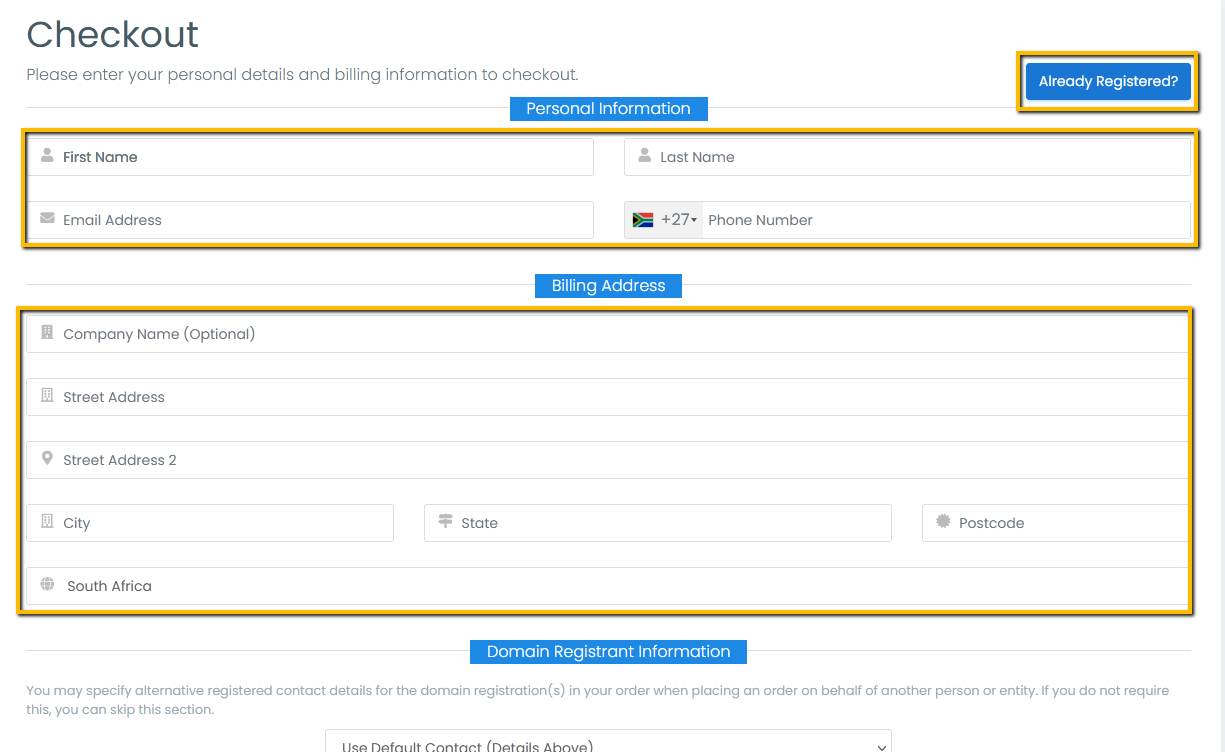
- To pay your invoice, select one of the two payment options: "Pay (automatic renewal)" or "Pay (manual renewal)".
The "Pay (automatic renewal)" option will automatically renew your services before they expire.
The "Pay (manual renewal)" option will require you to manually renew your services before the expire (re-entering your payment details each time).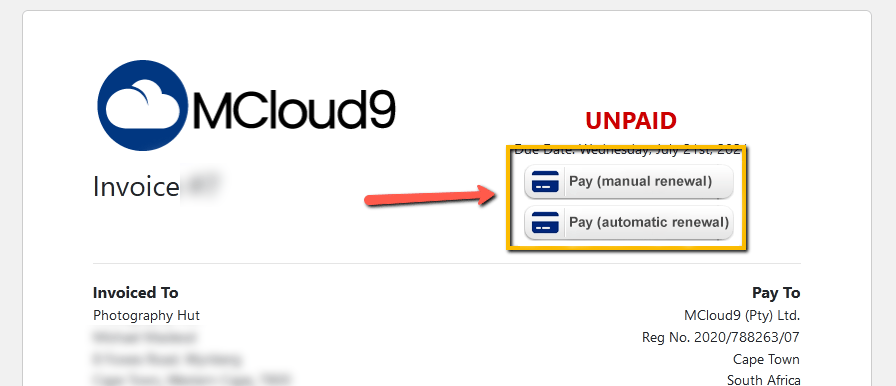
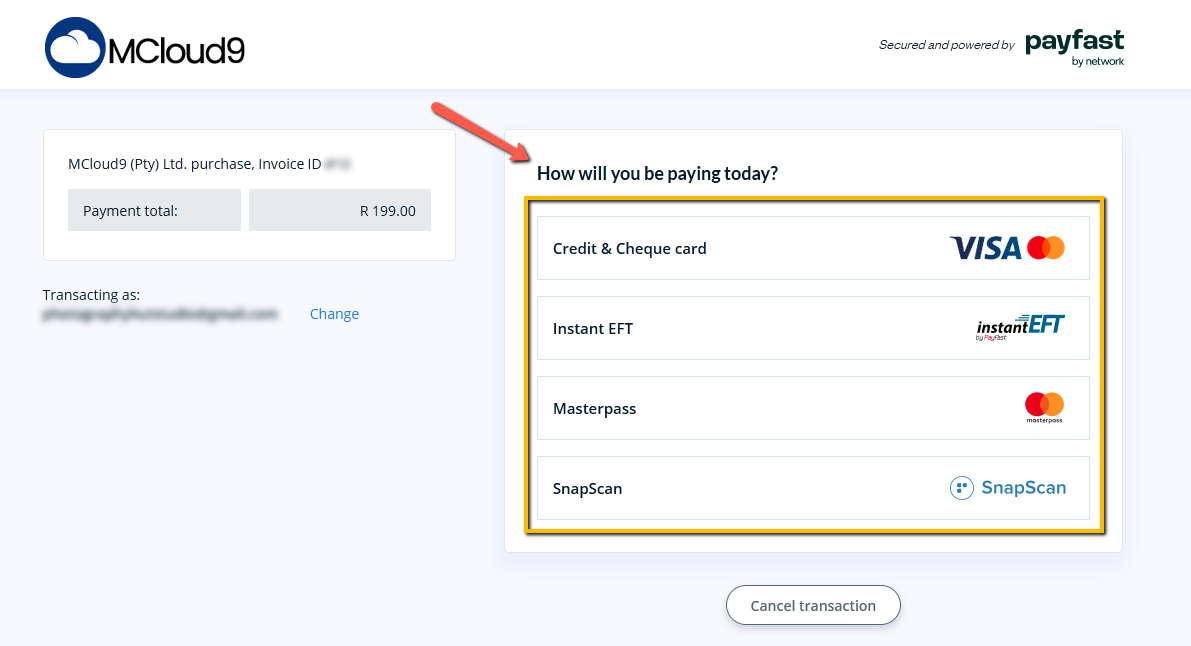
- After being redirected to our secure payment gateway, select your payment method (credit card, debit card, etc.) and complete the payment.

- Congratulations, you have transferred your domain to MCloud9!
After successfully completing the payment you will be redirected back to the paid invoice.
You will also receive an email with your invoice and links to your Client Portal where you can manage your services.
