Installing WordPress With 1-Click Install
In this tutorial, we will walk you through how to install WordPress with our 1-click installer.
WordPress is the most popular content management system (CMS) and with it you can create almost any type of website you can think of (blog site, eCommerce store, etc.).
If you have purchased one of our MCloud9 WordPress Hosting plans you will be able to install WordPress in seconds using our WordPress Manager.
If you haven’t then you view our other guide on installing software with our 1-click installer.
To install WordPress with 1-Click Install, follow these steps:
- Log in to your cPanel account.
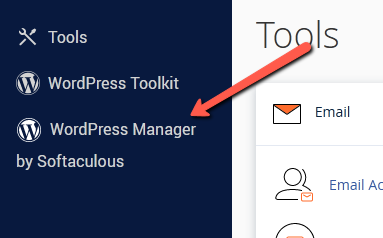
Follow our guide to learn how to access your cPanel account. - Access “WordPress Manager by Softaculous” either via the sidebar:
or under the Software section: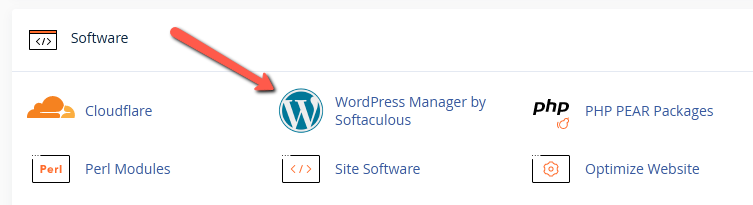
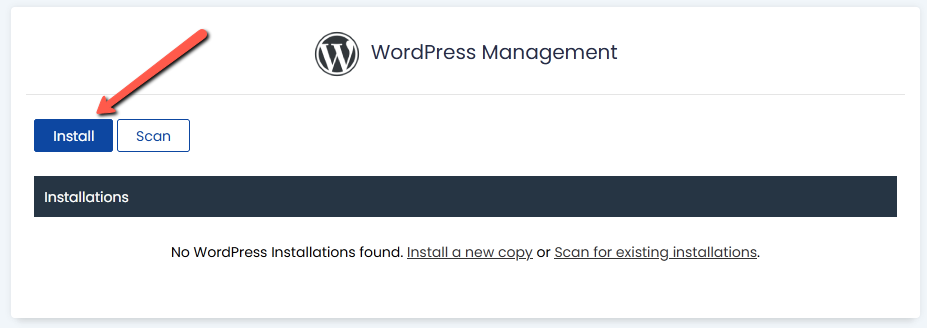
Tip: Use the quick search bar at the top of your cPanel account for speedy navigation. - Select the blue “Install” button.
- Fill in the installation details, then select “Install” at the bottom of the page.
Under the Software Setup: Installation URL is the address your WordPress website will be installed on. If you want your domain installed on your main domain (“www.mydomain.com”), and not in a subfolder (www.mydomain.com/subfolder), then remove “wp” from the “In Directory”’ text field. Choose the version of WordPress you want to install (usually the latest version).
Under Site Settings section: enter your website name and description (you can leave the checkboxes unticked).
Under the Admin Account section: create a username and password to access the WordPress backend dashboard. Also be sure to enter your email for the admin account.
Under Choose Language section: select the default language of your website.
Under Select Plugin(s) section: skip this section unless you want to install one of the plugins listed (you can always install these later).
Under Advanced Options section: in most cases these settings can be left as default.
Note: The Select Theme section is completely optional. WordPress comes with its own set of themes.
Note: If you want the installation details emailed to you or someone else, enter the email address in the field below the “Install” button.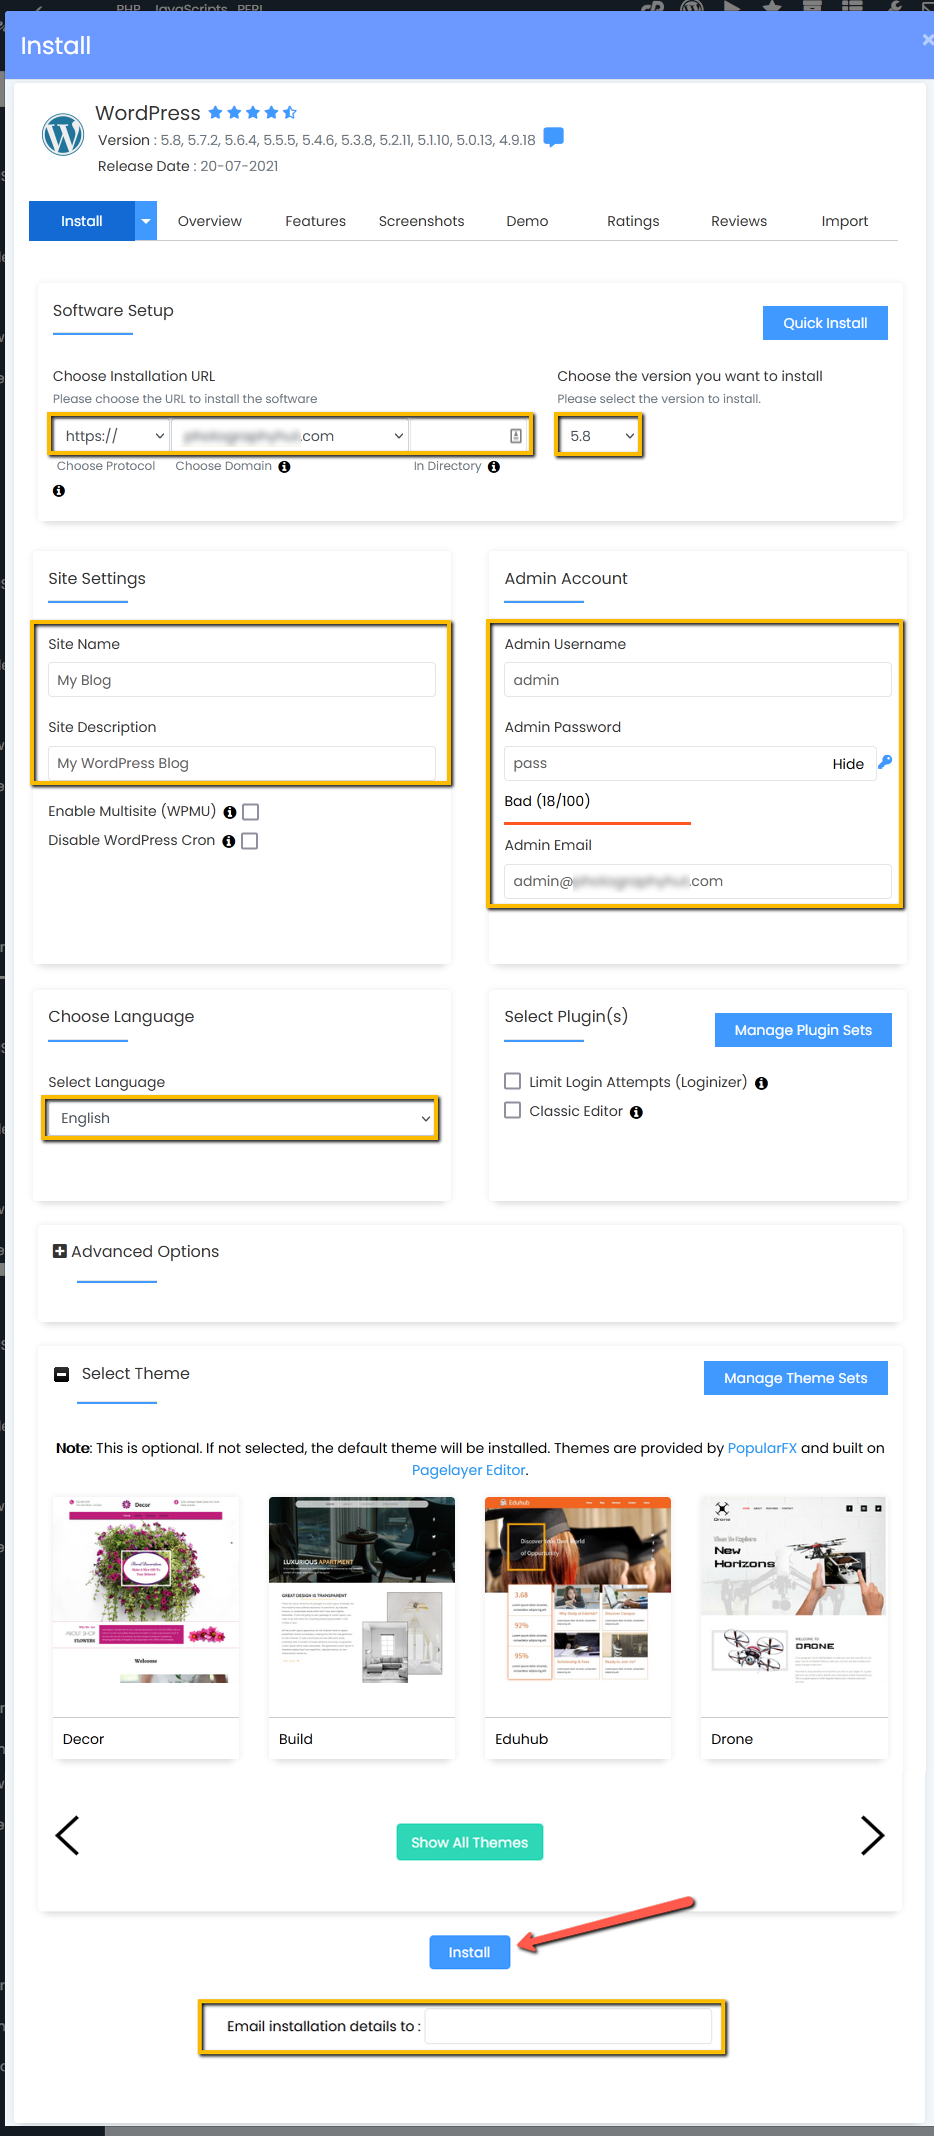
- Congratulations! You have successfully installed WordPress!
Once the installation has completed you will see a successful installation message along with the addresses to your new WordPress website and WordPress admin.
Tip: Bookmark these addresses for easy access later.
