Upgrading/Downgrading Your Services
In this tutorial we will walk you through upgrading and downgrading your MCloud9 products/services.
You may upgrade or downgrade your products and services, including add-ons, at any time using the Client Portal.
Note: Some products and services are not eligible to be upgraded or downgraded (e.g. domains, certain add-ons, etc.).
To upgrade/downgrade your product or service, follow these steps:
- Log in to your Client Portal.
Follow this guide to learn how to access your Client Portal. - Select the “Services” box near the top of the Home page, or select “Services” in the side menu and choose “My Services”.
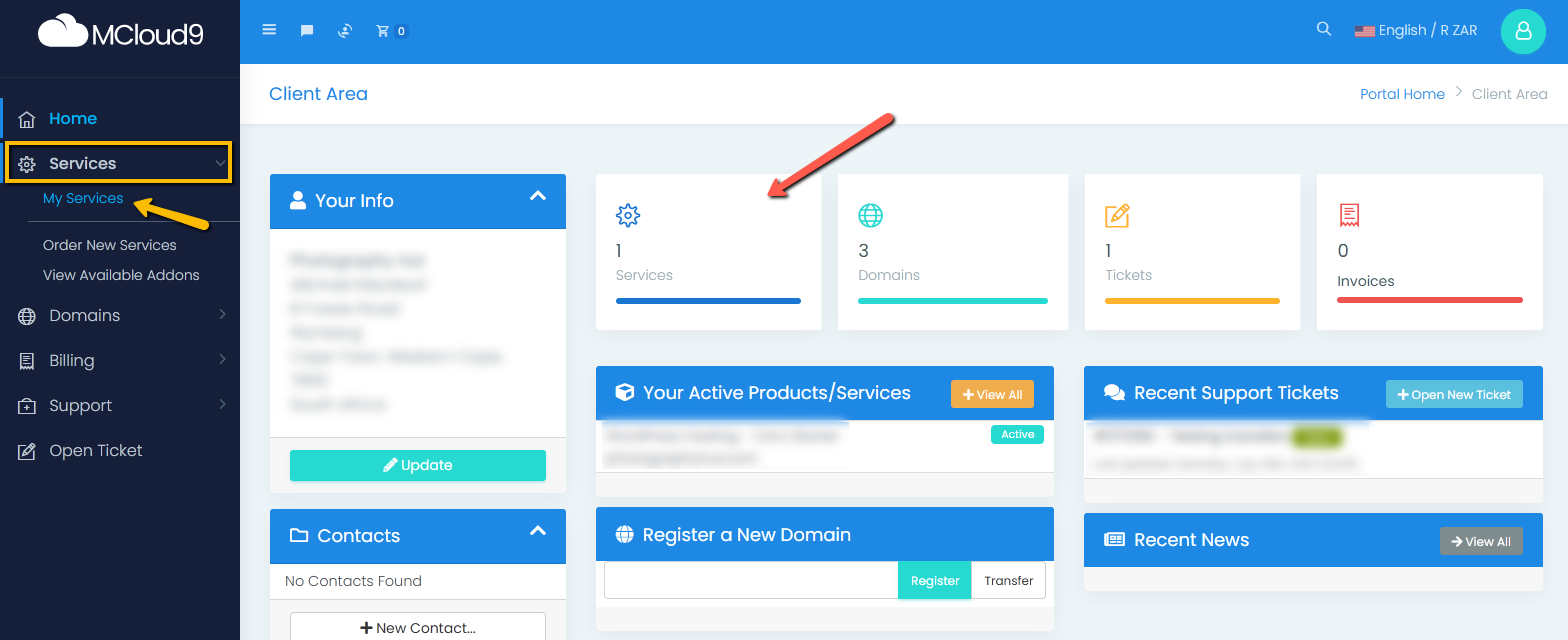
- This will display a list of your products/services.
Select the product/service you want to make changes to.
- Select “Upgrade/Downgrade” in the Actions panel.
If you want to upgrade or downgrade an add-on for the product/service, select “Upgrade/Downgrade Options”.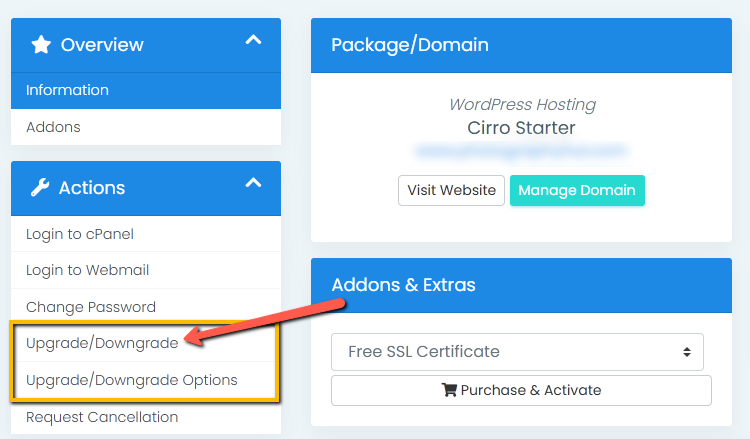
- Choose the product/service you wish to upgrade or downgrade and specify the duration (if applicable), then select “Choose Product”.
The upgrade/downgrade price will be calculated based on the difference in price between the unused portion of your current plan and price of the new plan for the same period.
Note: If you are downgrading, the balance will be credited to your MCloud9 account.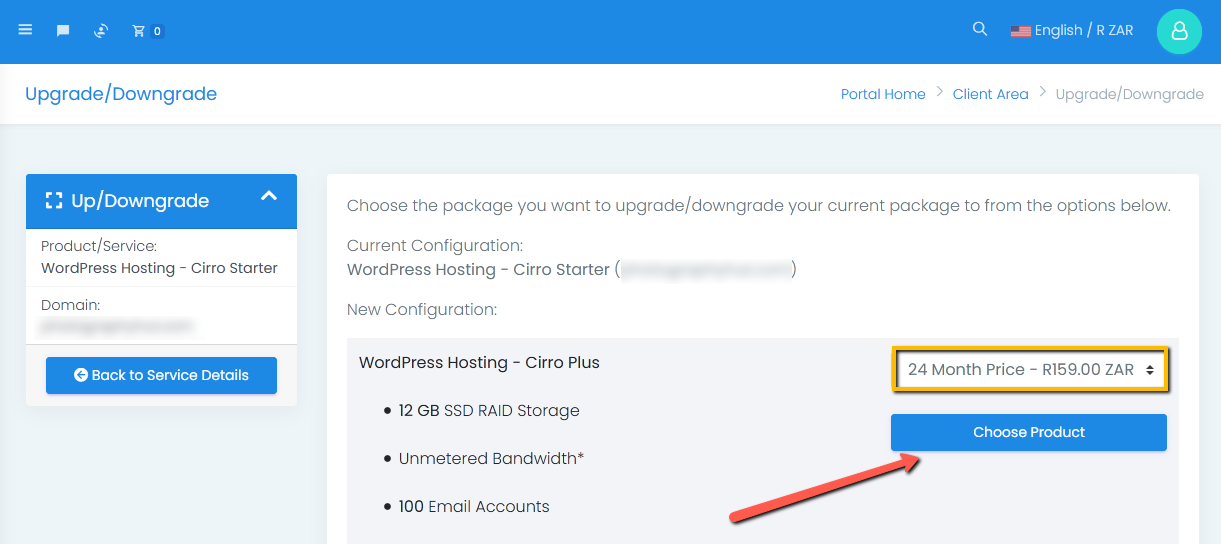
- View the order summary and verify the Payment Method, then choose “Continue”.
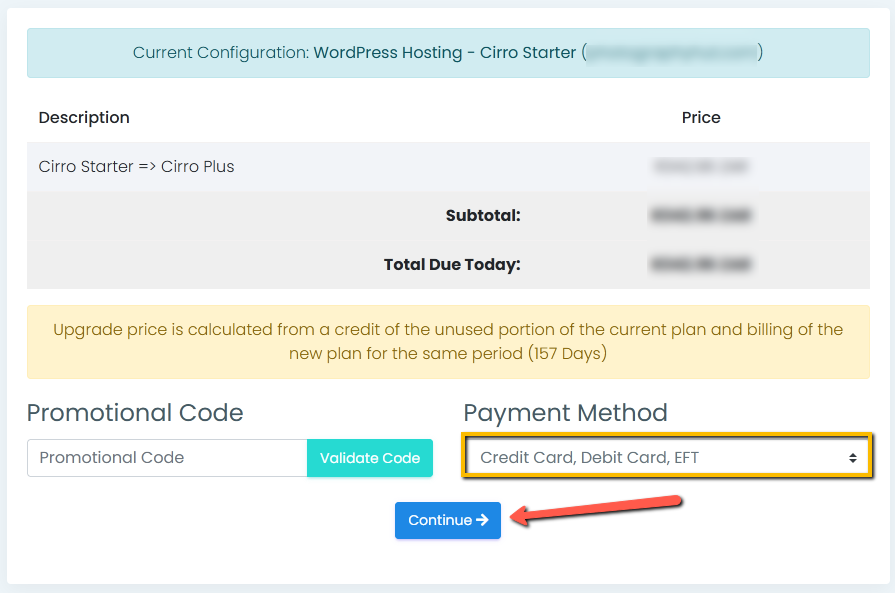
- To pay your invoice, select one of the two payment options: "Pay (automatic renewal)" or "Pay (manual renewal)".
The "Pay (automatic renewal)" option will automatically renew your services before they expire.
The "Pay (manual renewal)" option will require you to manually renew your services before the expire (re-entering your payment details each time).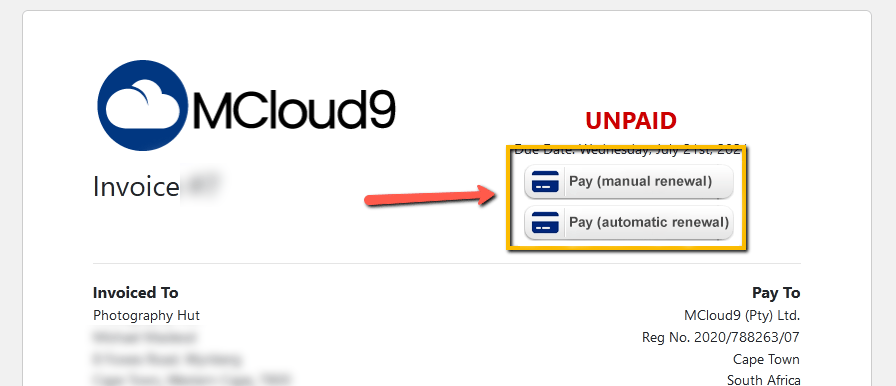
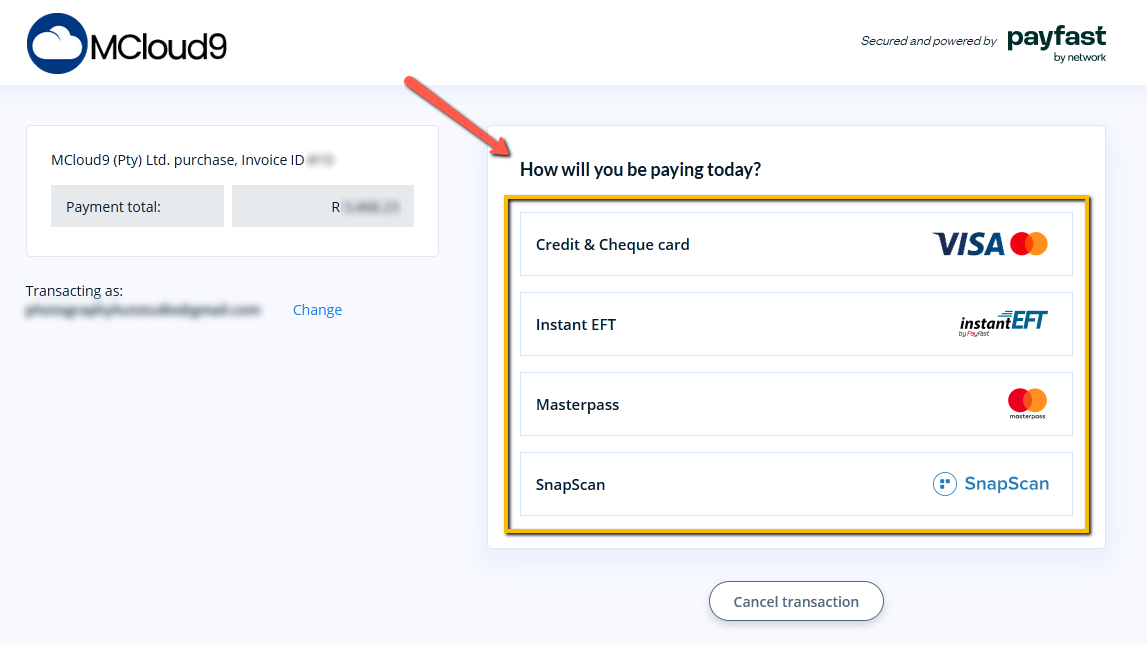
- After being redirected to our secure payment gateway, select your payment method (credit card, debit card, etc.) and complete the payment.
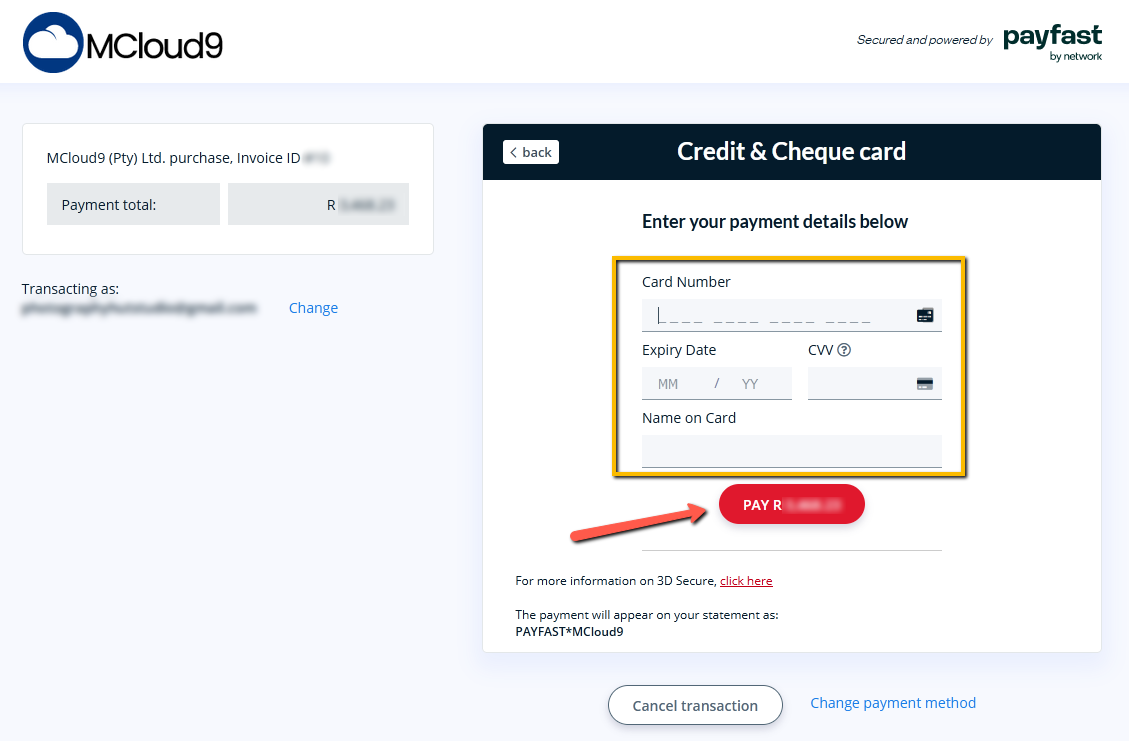
- Congratulations, you have now upgraded/downgraded your product!
After successfully completing the payment you will be redirected back to the paid invoice.
