Changing Your Domain's Nameservers
In this tutorial we will walk you through changing/updating the nameservers for your domain.
By default, all domains registered with MCloud9 use our default nameservers so that they will seamlessly connect to your hosting account with us.
You can change the nameservers to use your own custom nameservers at any time via the MCloud9 Client Portal.
To change/update your domain nameservers, follow these steps:
- Log in to your Client Portal.
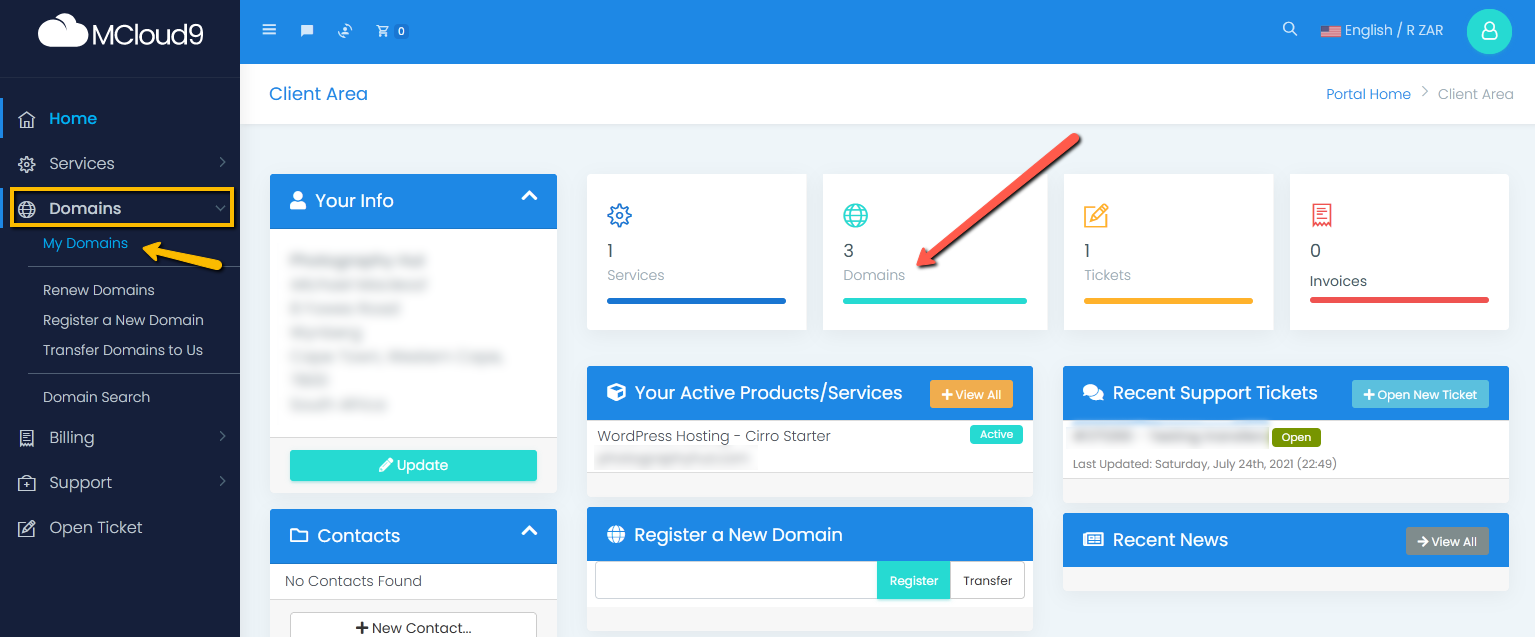
Follow this guide to learn how to access your Client Portal. - Select the “Domains” box near the top of the Home page, or select “Domains” in the side menu and choose “My Domains”.

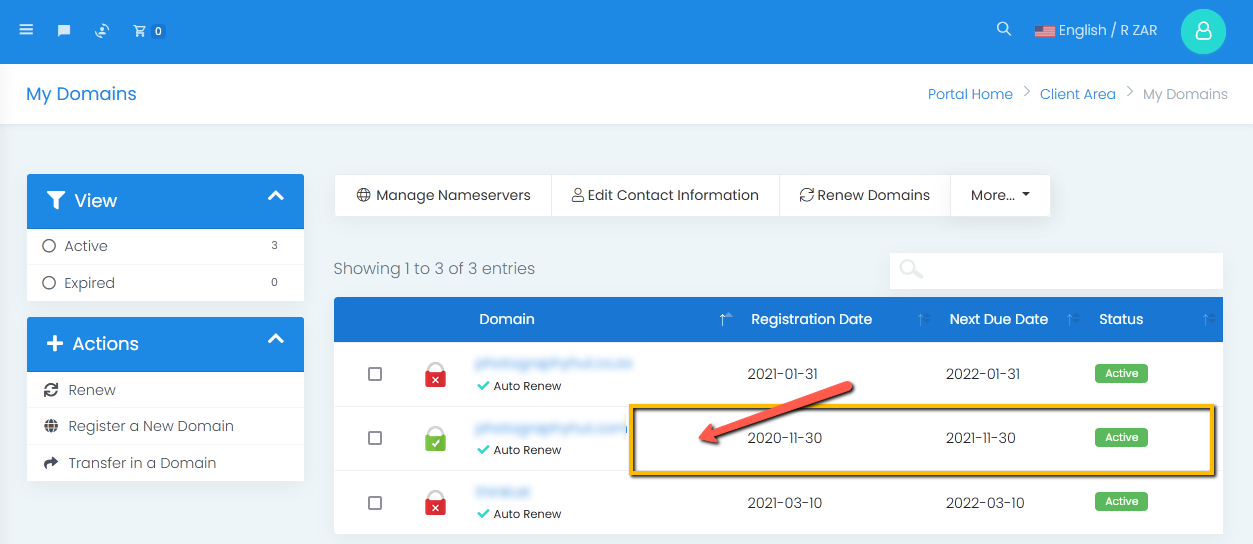
- This will display a list of all your domains registered with MCloud9.
Select the domain you want to modify.
Tip: Select any area in line with the domain name. Selecting the domain name itself will open your domain in a new browser tab.
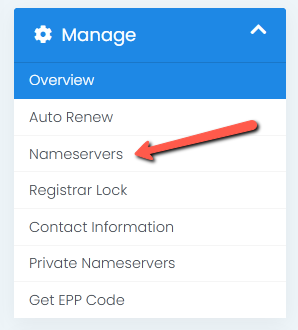
- Select “Nameservers” in the Manage panel.

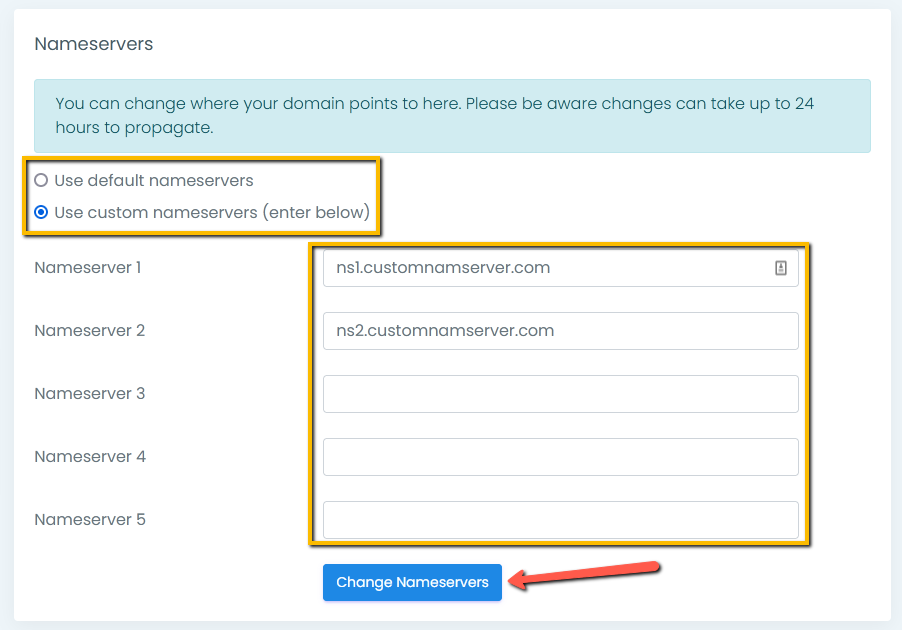
- Select “Use custom nameservers” and enter your new domain nameservers, then choose “Change Nameservers”.
You can always switch back to using the default nameservers by selecting “Use default nameservers”.
You can switch back by entering the MCloud9 nameserver addresses manually (see MCloud9 nameservers details below).
Note: Some domains’ nameservers have to be changed manually by the registrar.
Contact our Technical Support department to assist.
- Congratulations, you have successfully changed your domain nameservers!
Note: Domain nameserver changes can take up to 24 hours to propagate.
MCloud9 Nameserver Details:
Use these nameservers to point your domain to MCloud9.
- ns1.mcloud9.co.za
- ns2.mcloud9.co.za
- ns3.mcloud9.co.za
- ns4.mcloud9.co.za
